
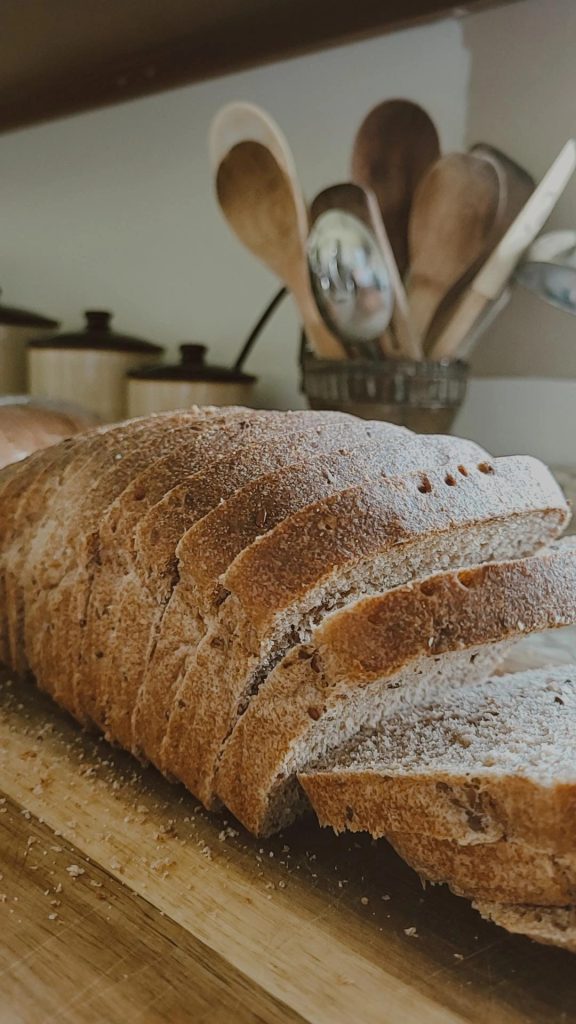
Freshly Milled, 100% Whole Wheat Sourdough Sandwich Bread
It’s truly hard to beat a warm slice of whole wheat, freshly milled piece of sourdough bread, slathered with butter and honey. Soo good!!
One of my favorite things right now is to get up, have a slow morning, and then have a delicious breakfast of a thickly sliced, toasted 100% whole grain, freshly milled sourdough bread with a fresh egg or two from our little hens in the back yard. Seriously, it makes my mouth water as I write! And then I’m set for the day!
After eating a slice of bread with an egg or two, we are truly satisfied for many hours. For a busy mom like me, this is a huge win!!! Unlike starting the day with say, cereals, where you have hardly finished the kitchen cleanup from the meal & the children, not only hyper from the sugar, are also grouchy & asking for something to eat Again! So then, here come more snacks… & the day continues, with so many snacks & interactions with food, all because the food we are trying to fill their bellies with is not truly nourishing & satisfying.
Many times, after breakfast, all we need for a little pick me up to get us from breakfast to dinner is a light lunch like veggies, cheese, & fruit. It’s actually very helpful to me in that I spend way less time in the kitchen cooking & can be doing other things with my family or doing projects I enjoy.
Another reason I have come to love baking with freshly milled flour, is knowing all the health benefits that come with it! Check out more about that from Sue Becker, she has a world of wisdom on this topic.
Yes, it is a challenge, like everything else you do for the first time. But to me, this hard is something that I am so willing to walk through for the long-term health of our family.
Why Use Whole Grains?
One of the biggest improvements I have noticed for myself since switching to whole grains is, (I’m sorry, a little tmi) I no longer have a hard stool like a used to & am now able to even sometimes have a couple bowel movements a day! I used to only go once a day & that was hard & miserable, to be honest, but I thought that must just be normal since that was my experience most of my life. Come to find out, 1-it’s not normal & 2- it’s the fiber in the grain that is making a big difference! (Now I also am working on being more intentionally active & I know that has really benefitted me as well.)
Whole grains, & specifically, Wheat berries are rich in several essential vitamins and minerals, including:
- Iron: Important for blood health.
- Zinc: Supports immune function.
- Magnesium: Vital for muscle and nerve function.
- Vitamin B6: Important for metabolism and brain health.
- Phosphorus, Manganese, Niacin, Thiamin, Calcium: Contribute to various bodily functions and overall health. 2
These are some of the most vital things needed in a healthy diet! Sue Becker pointed out that for one to have a complete meal that has all the essential vitamins and nutrients, you can get this by having bread with whole grains, say a sandwich, alongside fruit, & you are covered! Now I’m also a firm believer in lots of meat, so, take this with a grain of salt, but there is something to it!
Again, I would highly recommend listening & reading to get to know more about all of this from The Bread Beckers! Whole Grain Goodness – Bread Beckers They are a whole wealth of knowledge on this topic.

To achieve true health, I believe we need to consume our foods as close to the way the Lord has provided them as possible. The more we process them & mess with the way they were created, the more this poses high possibilities of us having imbalances & issues to deal with. Now, obviously, we often need to prepare our food & that takes processing it, but that is different from the major processes of dissecting foods so many ways just for shelf life & preservation, then proceeding to eat those separate portions in very high amounts that gets us in trouble.
Flour is one of those foods that has been heavily refined so it can last longer on the shelf and create soft, fluffy baked goods. But in the process, most of the grain’s natural nutrients — including the fiber, vitamins, and healthy fats — are removed. Without these parts of the grain, refined flour digests very quickly, which can lead to rapid spikes in blood sugar and leave us feeling hungry again soon after eating. Because these foods are easy to overeat and less satisfying, they can contribute to imbalances in how our bodies process carbohydrates. Choosing whole grains brings back the fiber and nutrients that support steadier energy, better digestion, and a more satisfying way of eating.
Now, if you know me at all, you probably know I’m very all or none, & now knowing this, I’m especially so, & am happy to let white flour go as much as possible. I tend to feel as if bread made with only white flour is practically Botox bread (forgive me), just fake lifeless fluff that cobs up the function of our bodies & health. This really gives me incentive to work hard to provide nourishing baked goods, especially bread with whole grains.
So, I want to provide a recipe that has worked well for me, using the whole grains- freshly milled. Not sifting out the bran or adding white flour… just baking more like Ma Ingalls might have! Keeping all the ingredients of the flour & rising the dough the ancient way, with sourdough.
How to Get a Strong Active Sourdough Starter
The first part of being able to bake a beautiful loaf with freshly milled flour, is by making sure I have a happy active sourdough starter, ready to be used at any time.

For me this looks like feeding it well each time my jar of starter is running low. I feed it without any measurements, just aiming for a very thick consistency, lots more flour than water (or milk/whey/buttermilk [whatever I fancy to feed it with at the time]). Then I let that get a good start on fermenting (30-60 minutes) before I go ahead & pop it into the refrigerator to continue growing until I need it! It may be a day or a week.
If I find it hasn’t fully risen yet & I want to use it for bread in a few hours, I just pull it out of the fridge & let it warm up on the counter, speeding the process up a bit more.
I really don’t stress about it. I just aim for a happy looking starter with lots of bubbles. I feel comfortable using my starter even when it hasn’t completely risen & fallen, I just know the bulk rise will probably take a little longer. I also use a hungry starter for bread, knowing it will be a lot faster acting since it was so hungry. Granted, if my starter hasn’t been used in a month or so I wouldn’t use that for bread without doing a few feedings to get it super strong & active but say if it’s been a week or so without feeding, but it has been a very strong active starter in that time I will use it freely, just knowing it will potentially act a lot faster.
How to get a soft, hydrated loaf made of freshly milled whole grains?
Next to having a strong healthy sourdough starter, allowing your freshly milled grains time to absorb the liquid is absolute key for a moist loaf that doesn’t just crumble when you slice it. This also means you need a tad more liquid whenever you are converting a recipe from white flour to freshly milled whole grains.
🌾 Why whole‑grain doughs need extra rest
Whole grains behave differently because they contain the bran and germ, not just the starchy endosperm. Resting time becomes essential for three big reasons:
1. Hydration takes longer
Bran is thirsty. It absorbs water slowly and unevenly. During a rest (often called an autolyse), the water has time to fully penetrate the bran and germ. This leads to:
- softer dough texture
- better gluten development
- less tearing during shaping
Search results confirm that resting allows moisture to distribute evenly and improves dough texture.
2. Gluten needs time to relax
Bran particles are sharp—they literally cut through gluten strands. Resting gives the gluten network time to:
- repair and strengthen
- relax so the dough becomes workable
- stretch without snapping back
This aligns with sources noting that resting helps gluten relax and improves structure.
3. Flavor and fermentation improve
Whole grains contain natural enzymes and nutrients that feed yeast beautifully. A rest allows:
- deeper, nuttier flavor development
- better rise and lighter crumb
- more even fermentation
I like to say sourdough loves the whole grains. I find it generally actually acts quicker with freshly milled whole grains than with white flour.
How do I make 100% Whole Wheat Freshly Milled Sourdough Sandwich Bread
Typically, I find mixing my bread dough in the evening works best for me, so I will give you what I have found that works well, & you can adjust the timing as it works well for you.
I start around 7pm, right as I’m tucking my kitchen to bed. I add my sourdough starter to the mixing bowl with warm water. (I do warm water especially if it is wintertime & the kitchen is colder- slowing fermentation, or if my starter is cold straight from the refrigerator. If you know it might be a little longer that 10-12 hours until you get to it, I’d suggest using cold or lukewarm water to make so it doesn’t act quite as fast.) Mix this well so the yeast will be spread well through the whole dough.
Then add your honey, oil, salt & freshly milled flour.
For milling my grains, I find it to work well to weigh out the exact amount of berries & milling straight into my mixing bowl. There have been times where I put my bowl onto the scales & weigh as I grind. Each of these work, I just find it less ‘stressful’ if you will, to do the latter.
I mix all the ingredients together very well, making sure there is no dry flour at all.
I then throw a wet towel over it & let the dough rest for at least 30 minutes, up to an hour. This is absolutely essential when using whole grains.
After this resting time, I start with my first round of stretch & folds.
What Are Stretch & Folds?
Stretch & folds are where you grab the side of the dough lift up, stretching the dough, then fold it into the middle of the dough. You repeat this motion all around the dough.
You essentially are just working the dough to create the gluten. If this stretch & folds feel complicated to you, just kneed it. You just want to work the dough & develop the gluten.
I continue to repeat these every 15 minutes give or take, 3-4 times until the dough doesn’t break when I stretch it & the dough has a smooth glossy look to it.
I then put a lid on my bowl or a put a plastic wrap on it to keep the gnats out & keep it from drying out, then leave my dough out on the counter overnight, about 8-10 hours, to rise & double in size. This is called the bulk rise.
Shaping the sandwich loaf
The next morning, I put a little bit of olive oil on the counter & coax the dough onto it. I don’t even use a rolling pin, I just flatten out the dough into a rectangle, dimpling it to get out the air bubbles, then roll it into a log. I then drag it toward me on the counter to create more tension causing it to be a tighter loaf. Tuck the ends underneath & let it rest on the counter while I get the bread pan ready.
I either oil my pan or line it with parchment paper. Parchment paper seems to work best for my pans.
I then plop my loaf into the bread pan, seam side down. Give it some love pats & rub the leftover oil on the top to help it to stay soft.
Rising & Baking
Now it’s time to let it do its final rise.
For this I often put my loaf into the oven, Not turned on though! This is just to keep it safe from the gnats or fruit flies. I have an electric oven, so this works well for me. If I need to use the oven, I will leave it on the countertop & cover it lightly with a plastic wrap or something to keep the gnats away, while also keeping it nice & moist.
When the loaf has risen above the pan about an inch or so (just nice & puffy), I preheat the oven to 350 degrees F, and bake for about 40-45 minutes until the internal temperature of the loaf is around 195 degrees F.
I then bring out my loaf, tip it out of the bread pan & let it cool for at least one hour before I slice it & bag it for the coming days.
Now obviously, we most often get a slice or two when it is still warm to have with butter & honey, but you don’t want to slice the entire thing right away before it has cooled since that tends to smash the loaf & you end up with thick chunky crumbs.
Storing
This bread keeps for a nice long while in plastic bread bags, like a week or so. Beeswax bags would be even better!
If you are concerned that it might get moldy after having it out for about a week or so, you can keep it in the fridge or pop it in the freezer. It will keep in the freezer for 3+months!
Also, another hot tip… We do not use a microwave, so I do not have any quick convenient ways of thawing bread. This has led me to start slicing my loaves before I freeze them & that allows me to pop off a piece if I get in a pinch- having forgotten to thaw some ahead of time! Also, it does help with making the loaves last longer if Mom cuts the bread & has thinner slices, rather than the hungry youngster, or maybe not so young ha-ha, lopping off a giant hunk with glee. (I’ve totally done this lol)
There you have it friends! I do hope you give freshly ground whole wheat a try for your next loaf of bread for your family! It is a treat for sure!!

100% Whole Grain Sourdough Sandwich Bread
Ingredients
- 1/3 cup (65 grams) bubbly & active sourdough starter
- 1 1/3 cups (350 grams) warm filtered water
- 1/4 cup (56 grams) honey
- 3 1/2- 4 cups (500 grams) hard white or hard red wheat flour, freshly ground
- 1 1/2 tablespoons (20 grams) extra virgin olive oil
- 2 teaspoons (9 grams) salt
Directions
- Add warm water & starter to a bowl. Add honey & stir until well combined. Add flour, oil, & salt. Stir until everything is well combined & a shaggy dough is formed.
- Cover with a clean damp towel & let it rest for 30 minutes to hour.
- Do a series of stretch & folds 3-4 times every 15-30 minutes.
- Cover bowl with saran wrap or a lid to keep it from drying out & let the dough do a bulk rise at room temperature overnight until it doubles its size (approximately 8-10 hours). long ferment option- after stretch & folds (approx. 2 hours), put into the refrigerator for 24-48 hours.
- Lightly oil your countertop. Remove the dough from the bowl, gently working/stretching it into a rectangle shape, dimpling the dough with your fingers to release air bubbles. Roll it into a log, tuck the ends underneath. Tighten loaf by gently pulling it towards you on the countertop, approximately 5-7″.
- Plop your loaf into an oiled or parchment lined bread pan seam side down. Lightly oil the top of the loaf with leftover oil.
- Cover & let it rise for about 1-2 hours until it is close to double in size (this varies in the temperature of your house)
- Preheat your oven to 350 degrees F
- Bake in the center of the oven for 40+ minutes or until the internal temperature is 195-200 degrees F.
- Remove from bread pan & let it cool completely before slicing to prevent deflating. (unless you can’t resist lol)
Storing & freezing
Store in an airtight bag for up to a week or put in the freezer for up to 3 months. Defrost it at room temperature.

